 |
| View from Carrs Lookout |
Showing posts with label Main Range. Show all posts
Showing posts with label Main Range. Show all posts
Monday, 20 October 2014
The Falls Drive
Monday, 5 May 2014
Gap Creek Falls

Date: 13 April 2014
One of the last remaining track walks starting from Cunningham's Gap that Maree and I were yet to do was to Gap Creek Falls. I guess the thought of driving up the range only to walk back down again just never appealed to us. However, with overcast weather and cloud covering all the peaks we decided it was a good day to head down the range.
Tuesday, 12 June 2012
Mt. Matheson Circuit
Date: 9th June 2012
Looking to make the most of the long weekend Maree and I decided to head out for a walk. We decided on a circuit starting at Spicers Gap on the Main Range heading up Mt. Matheson. The walk started from the picnic ground next to the Spicers Gap campsite and was built by the National Parks Association. The track is nice and wide most of the way and had some really interesting features and a different outlook of the surrounding area.
Looking to make the most of the long weekend Maree and I decided to head out for a walk. We decided on a circuit starting at Spicers Gap on the Main Range heading up Mt. Matheson. The walk started from the picnic ground next to the Spicers Gap campsite and was built by the National Parks Association. The track is nice and wide most of the way and had some really interesting features and a different outlook of the surrounding area.
Sunday, 7 August 2011
Sylvesters Lookout to Mt. Castle
 |
| Campsite on Mt. Castle |
Walkers: Tom and Myself
Notes:
Day 1
Well I promised in my previous post from Hole in the Wall that I'd be back to this area soon. Wasn't sure it would be this soon, but Tom was heading off overseas this weekend for 6 months so I thought this would be a great place to take him as a fairwell.
Using my experiences from the last trip I decided to concentrate on the best bits from that walk and add in the trip to Mt. Castle. This walk was also recommended to me by some posters from the Bushwalking Australia Forums and avoids any access issues. The only downside being that the car journey in to Goomburra and on to Sylvesters Lookout takes a bit longer.
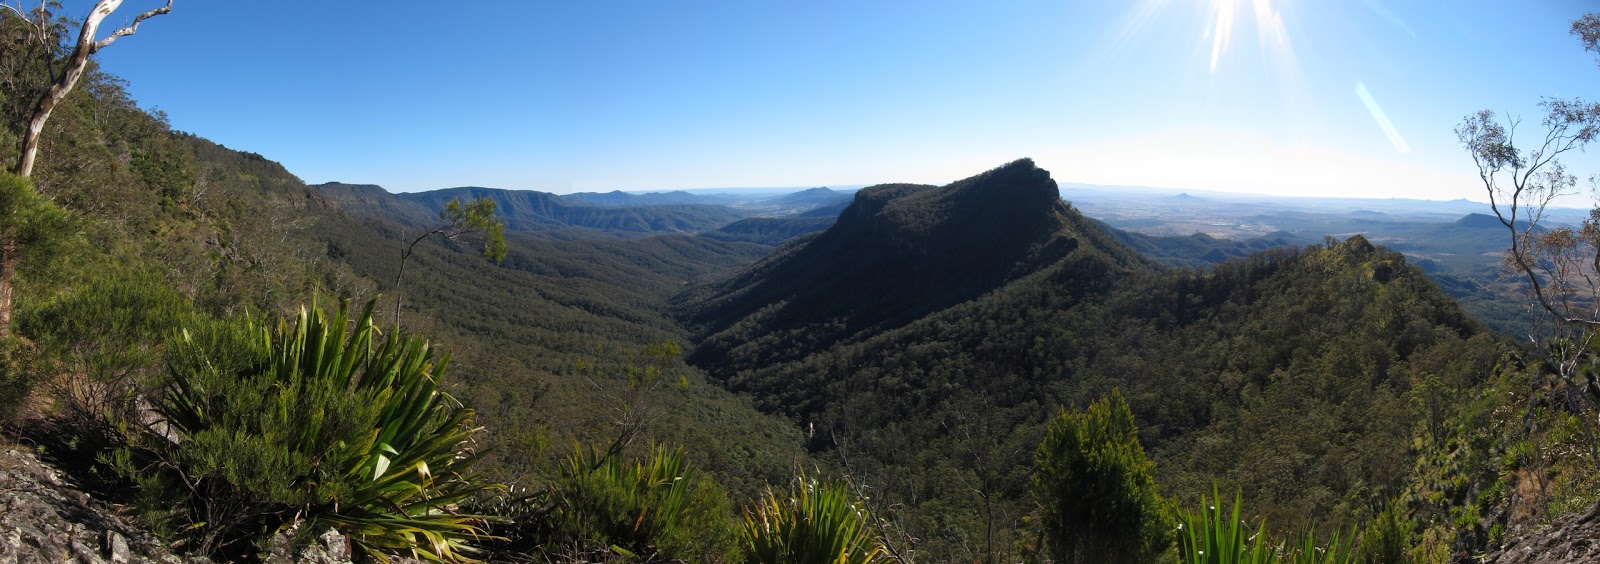
We arrived at the lookout by about 10:30 in the morning and after doing a bit of repacking got on the trail by about 11. The steep section after Sylvesters lookout wasn't nearly as bad as I remembered. Probably due to it being at the start of the walk rather than after 8 hours of bush bashing. We once again detoured to the old Sylvesters Lookout, however this time ventured out to the tip of the rocky spur through a clump of massive spear lillies and was rewarded with a more expansive and unobstructed view.
 |
| View from Old Sylvesters Lookout |
 |
| First Downclimb Section |
 | ||
| Negotiating the Ledge above HITW |
We reached HITW in around 2 hours and stopped there to enjoy the view and to eat lunch in the shade. The temperatures were surprisingly hot and reached 30 degrees in the middle of the day. From there we decided to follow the ridgeline as much as possible and between HITW and Boar's Head there was only one section where we had to deviate from the ridge line.
 |
| Ridge After HITW |
 |
| Tricky Downclimb Before Boar's Head |
 |
| Spear Lilly Flower |
 | |||
| Tom Vs Spear Lilly |
The campsite was located directly on the main peak of Mt. Castle and was padded with grass and broken up by some small gums and grass trees. It had an amazing view to the East however, care was taken not to venture too far in this direction because of the size and sheerness of the cliffs here.
 |
| Mt. Castle Campsite |
 |
| Looking Along the Southern Ridge at Sunset |
 |
| Tom En Route to the Pinnacle |
 |
| Myself Negotiating the Narrowest Section of the Ridge |
 |
| View Towards Mt. Castle from the Pinnacle |
 |
| View to the East from the Campsite |
 |
| View Towards Mt. Edwards with Fog |
 |
| View North-East from the Campsite |
We were soon packed up and back on our way. We decided to follow the track notes and take what we thought would be a more gradual route down by heading North to the Mt. Castle saddle then skirting back around. In the end this route was harder to follow and if you weren't careful you could easily end up lower on the mountain than intended. In hindsight we should have just gone back the way we had come up.
From there we back tracked along our route to HITW where we once again took advantage of the shade. We then decided to take the waterfall route back to the Laidley Ck Campsite for a bit of a change. This was definitely worth a look with the large cliffs leading to the waterfall crossing. There was only a trickle of water here and we were careful about where we walked on the slippery rocks. Although, there was a large enough shelf for this to not be too dangerous.
 |
| Cliffs leading up to Laidly Ck. Falls |
Thursday, 14 July 2011
Cunningham's Gap to Hole in the Wall
 |
| Laidley Valley & Mt. Castle |
Walkers: Myself
Notes:
Day 1
I wanted to get off track for a change after not having done anything like this since our Lost World walk last year. So after getting ideas from my trusty Take a Walk book I decided on Cunningham’s Gap on the Main Range as my starting point. I would follow the range North as far as I could in a day and at that stage the idea was to head back the way I’d come. As usual though, things didn’t all go according to plan.
The forecast for the weekend was COLD. BOM was predicting negative temperatures for Ipswich and that is what we awoke to on Saturday morning. The temperature gauge hanging from the car read just above -4 when I wiped the ice off it at 5AM. We set off soon after and after watching the sun rise on our way we arrived at Aratula for breakfast just after 6. Another 45 minutes and we were at the car park on top of the range and I managed to get going just before 7.
 |
| Sunrise over the Moogerah Peaks |
The first section of the route was via the Mt. Cordeau and Bare Rock marked track and I covered this first 6KM within an hour and a half. From this point the pace slowed significantly as the track all but disappeared. The track notes were fairly vague and I found the small details they did give not very useful as it was hard to gauge distance covered or to find some of the landmarks mentioned.
 |
| Is there a track in there? |
 |
| Climbing Vine |
 |
| Large trees and crows nests were the highlight from this section |
My general advice would be to keep track of the edge of the Eastern escarpment and not to stray too far from it in most cases. Sometimes foot pads could be found on the narrower ridges which was a godsend. However, as soon as you found one and got up some speed there would be a tree fall and it would disappear amongst the vines and foliage brought down from the tops.
The one feature that was hard to miss was the rocky spring fed creek. Despite earlier creek’s being dry this one still had a reasonable trickle so I filled up an extra litre of water here. There weren’t any obvious spots for lunch and in the end I left it too late to stop; I felt the effects of this throughout the afternoon.
After slogging up the final two or three peaks of the ridge I eventually made it to Sylvesters lookout by about 3 in the afternoon. I collapsed here for about half an hour before convincing myself to get up otherwise I wasn’t going to make it to camp before dark. The track leading to Laidley Ck. Falls and Hole in the Wall left from just before the lookout platform and was a much more defined foot pad than the previous section.
After descending slightly to a rocky gully the track rose steeply until it came to an obvious junction where an off shoot headed off to the right to the old Sylvesters Lookout. Despite the track notes describing the views as poor I thought it was well worth the small detour. The views back down the range were spectacular.
Once I rejoined the main track there was some more uphill before finally reaching the top of the ridge and subsequently descending all the way down the other side. This section travelled through some less dense eucalypt forest with shoulder high ferns often hiding the track in front of me. Once again my advice here is to keep closer to the escarpment than not. There was a large tree fall that blocked what looked like it used to be the track heading more directly down the ridge. After one more knee crushing muddy down-hill section I finally reached the camp site just before 5 and just in time to set up camp before dark.
 |
| Large gum trees surviving on an exposed ridge |
 |
| This section of the ridge was exposed to the strong Westerly |
Day 2
 |
| My campsite at Laidley Ck. Falls |
Overnight, the temperature didn’t reach the minimum’s that had been predicted by the bureau. Instead it only reached about 4 degrees. The wind did change direction at one point but overall the campsite was well protected from the 50km/h Westerly’s I’d experienced the day before (yes this was my first trip using my little Brunton weather station).
After my experiences of day 1 I decided that if possible I’d much rather not do the section from Bare Rock to Sylvesters lookout again. Luckily there was plenty of phone reception and I was able to organize my pickup to detour to Goomburra Valley instead of the gap and I would try to be back at the lookout by around 1PM.
I still hoped to get out to Hole in the Wall before heading back to the lookout so I followed the notes advice and headed North-West from the campsite on one of the obvious foot pads heading out of the campsite. I soon found Laidley Creek which had a very small trickle of water flowing. There were numerous foot pads in this area and it soon became quite confusing which one was the correct one. I eventually ended up at the cliff face at the top of the falls looking out towards the valley and Mt. Castle. It was obvious that this wasn’t the route described in the notes and I was running out of time so decided to just head for the main ridge and see what the not-so-recommended direct route was like.
I reached the tip of the main ridge quickly where I was greeted with amazing views down the Laidley Valley, across to Mt. Castle, out over the Moogerah Peaks and back along the Main Range. The track continued to the edge of a drop off which after closer inspection proved to be the way down. There was an indentation in the small cliff line with plenty of foot and hand holds. An obvious foot pad then continued through a small patch of trees before reaching another small drop off negotiated by down climbing a wide crack.
 |
| View back down the range and towards Moogerah Peaks & Mt. Barney |
From here the ridge narrowed significantly and become a rocky razorback only a metre or two across and sometimes less. Before long I reached a very narrow section which after inspecting more closely turned out to be the top of Hole in the Wall. I carefully crossed this section and found a way down off the ridge top not too much further on. Hole in the Wall was just that, a picturesque hollowed out section of the ridge with amazing views in all directions.
 |
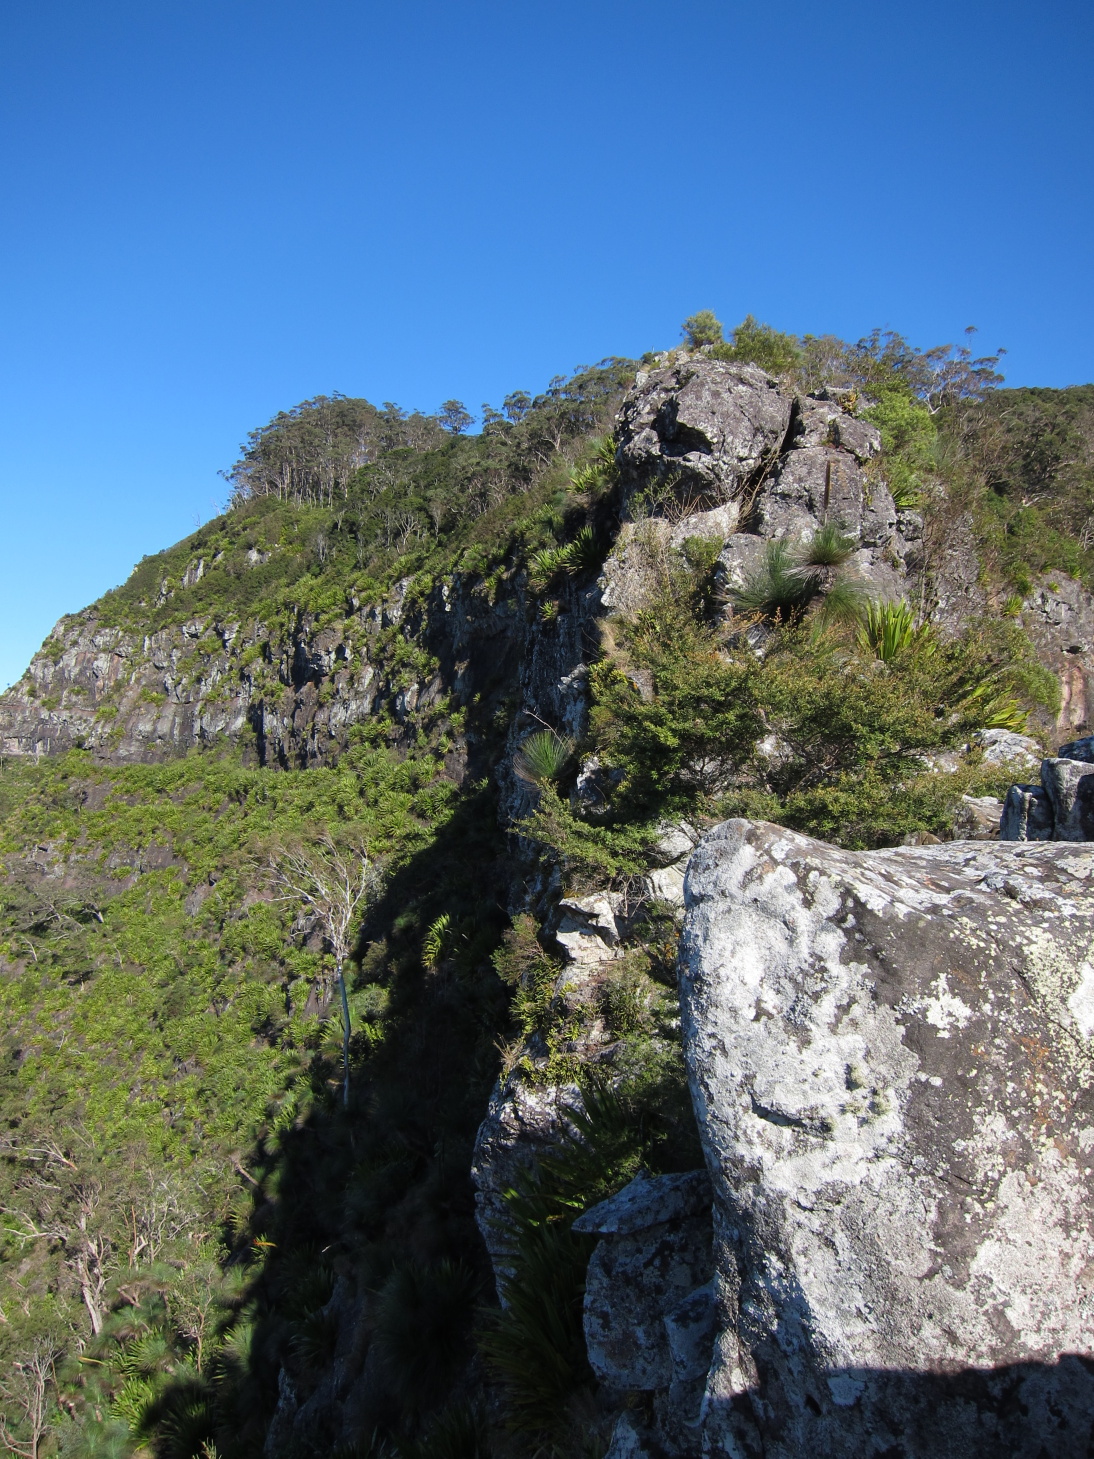
| Razorback ridge looking towards Boar's Head |
 |
| Looking back the way I'd come. You can see the large crack mentioned above |
 |
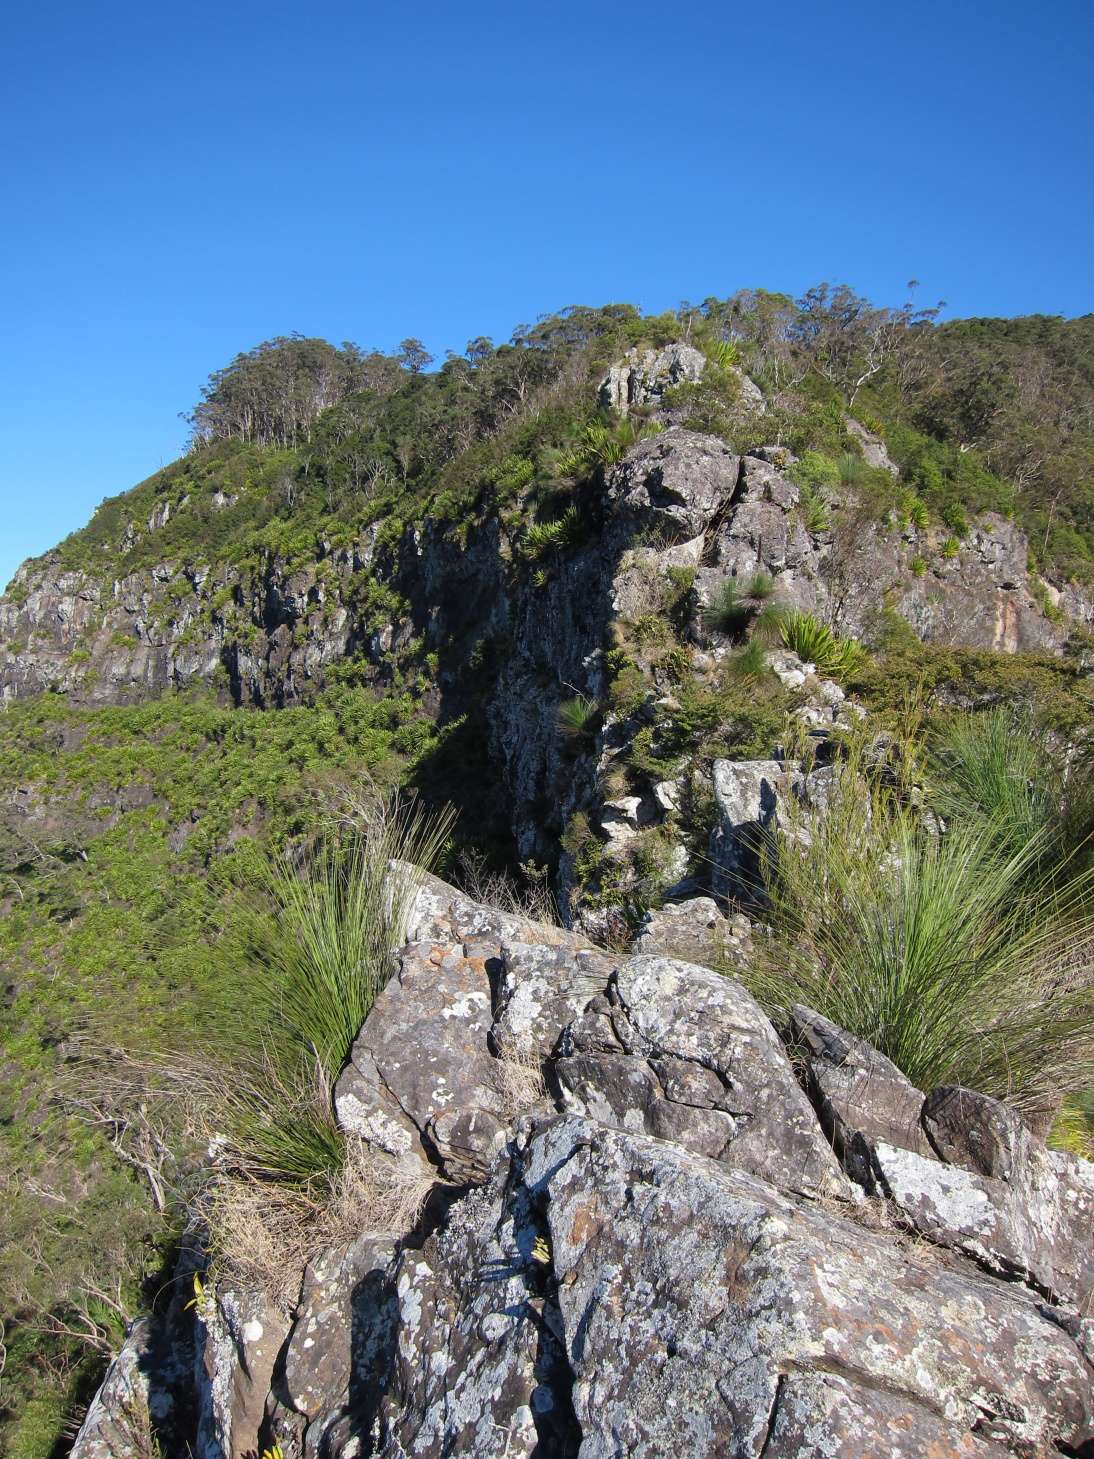
| A particularly narrow section of the ridge |
 |
| More Ridge |
 |
| Masses of spear lillies colonising the cliff faces |
 |
| Hole in the Wall from above |
 |
| It's a hole in the wall |
 |
| Laidley Valley through HITW |
After taking some photos and having a snack I shuffled off back the way I had come. In the end I had plenty of time to reach the lookout which allowed me time to take it easy on the up and down hill sections. I reached the road by about 11:40 and started heading down it towards the Goomburra camp ground. Half an hour later my ride appeared from around the bend and I was whisked back to civilization.
 |
| Self Portrait |
Overall this was a great adventure with my favourite bits being the views and rock scrambling on the second day. I’m already planning another trip heading to Mt. Castle in the not too distant future so stay tuned.
Thursday, 23 June 2011
Mt. Greville
Date: 19/6/2011
Walkers: Maree, Myself
Walk Description:
Ever since walking up Mt. Edwards last year I had wanted to get out to the slightly more impressive Mt. Greville. Standing at 770m it is one of the tallest of the Moogerah Peaks. We were following track notes from Take a Walk in S.E. Qld and at the end of the day were very happy with the route, which provided the best directions of travel for the views and terrain we encountered.
The trip from Ipswich took roughly an hour and a half with a breakfast stop along the way. The entrance to the National Park is on the South-East side of the mountain and consists of a small grassy carpark. After making some final gear adjustments we set off along the track following signs for Palm Gorge. This first section of the track followed an old management road beside a fence line until it eventually veered off to the right along a narrower foot pad.
 |
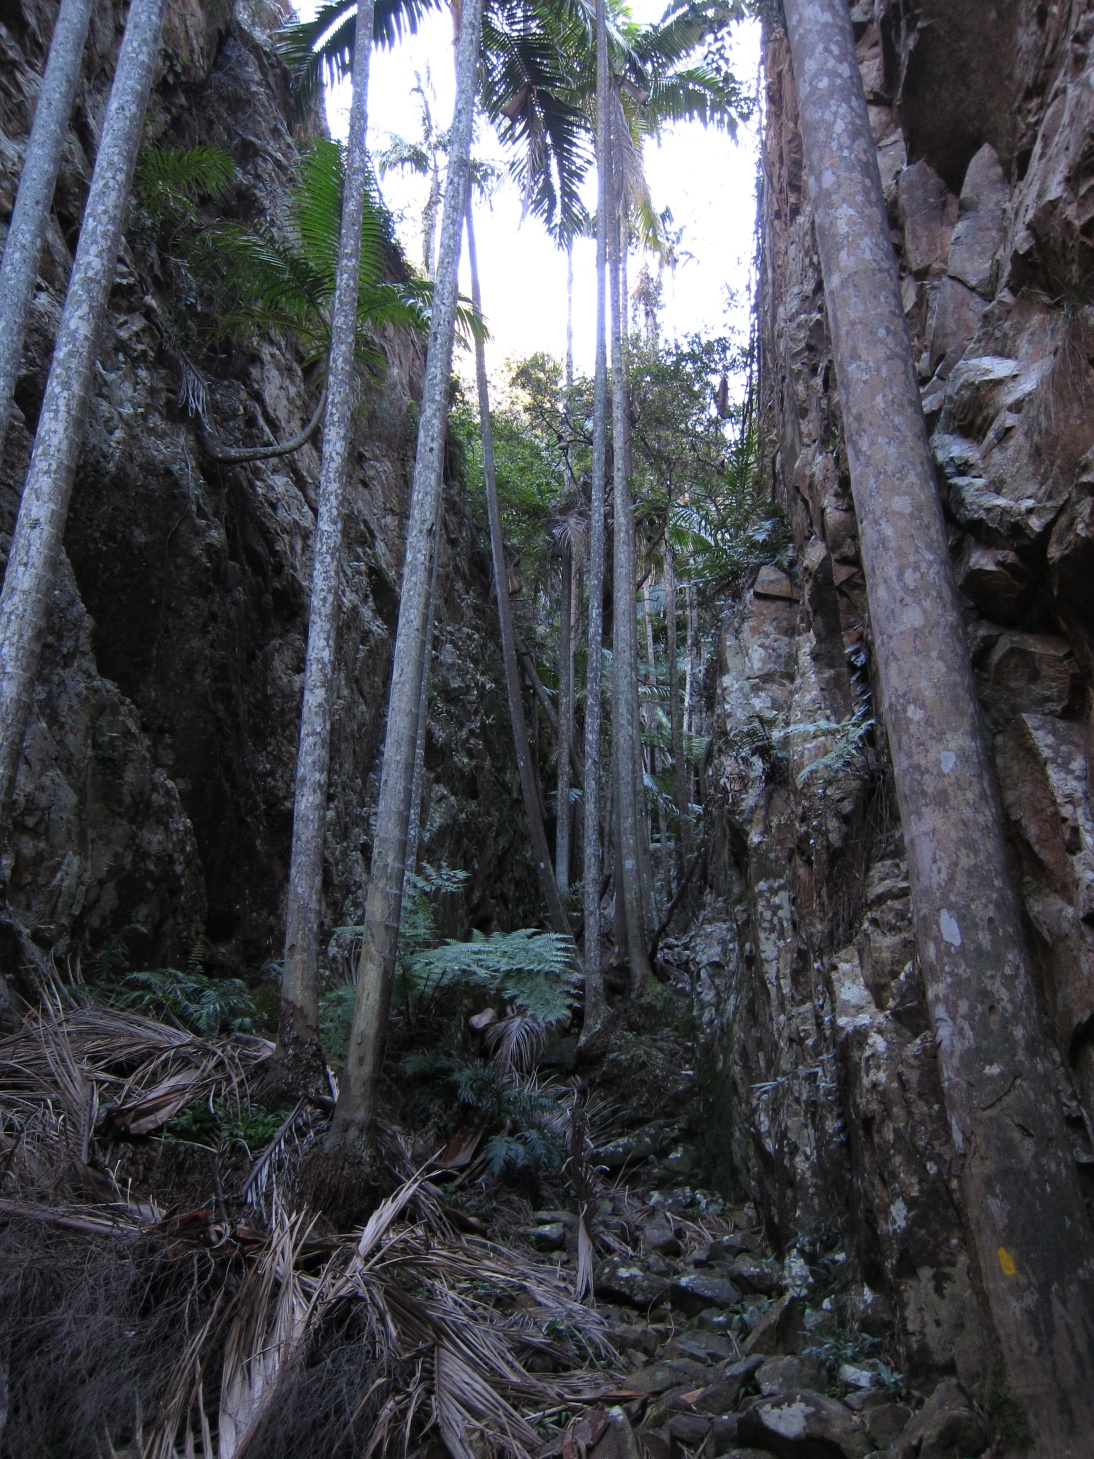
| Massive Palms in the Gorge |
The vegetation became very lush as we headed up hill and we could gradually see the walls of the gorge closing in until eventually its width would have been less than ten metres across. The name of the gorge was well deserved with numerous palm trees all stretching as high as they could to catch the sunlight at the top of the cliffs. The ground was very rocky and covered with palm fronds making progress slow in some sections. The gradient was reasonably steep and consistent most of the way up the gorge until we reached its head and the main track junction for the other routes up.
 |
| This fella was bigger than my hand. Some sort of Golden Orb? |
 |
| Narrow Section of the Gorge |
From here the vegetation dried out and more low shrubs crowded the track. Within a few minutes we reached a short side-track off to the left which gave us a good view towards the Main Range from the top of a steep rocky gully. After returning to the track we continued upwards towards the peak. The number of grass trees increased as we climbed higher and after negotiating a few steep sections of the track we reached the large cairn marking the peak. Views from the peak were largely obstructed by trees, however as the notes instructed there were great views from a rocky outcrop to the West.
 |
| Mt. Edwards & Lake Moogerah from the Peak |
 |
| Grass Tree Flowers |
After taking some photo’s we chose a rock each and had lunch before heading back the way we’d come. When we reached the junction at the top of the gorge we took the other option which headed towards the top of the South-East Ridge and our route down. The foot pad down this section wasn’t always obvious because of the large amount of rock slabs but the ridge was fairly easy to follow and provided a stark contrast to the track we’d taken on the way up. There were plenty of views across to Mt. Moon, the Main Range and even all the way through to Mt. Barney. The gradient was fairly easy going most of the way down except for one steep, loose and rocky section.
 |
| South-East Ridge |
Before long we had reached the main track junction again and it was only another couple of hundred metres back to the car. Overall I’d rate this as one of my favourite day walks in S.E. Queensland so far. The variation and uniqueness of the terrain and foliage within the one walk was amazing and I will definitely be heading back to explore Waterfall Gorge.
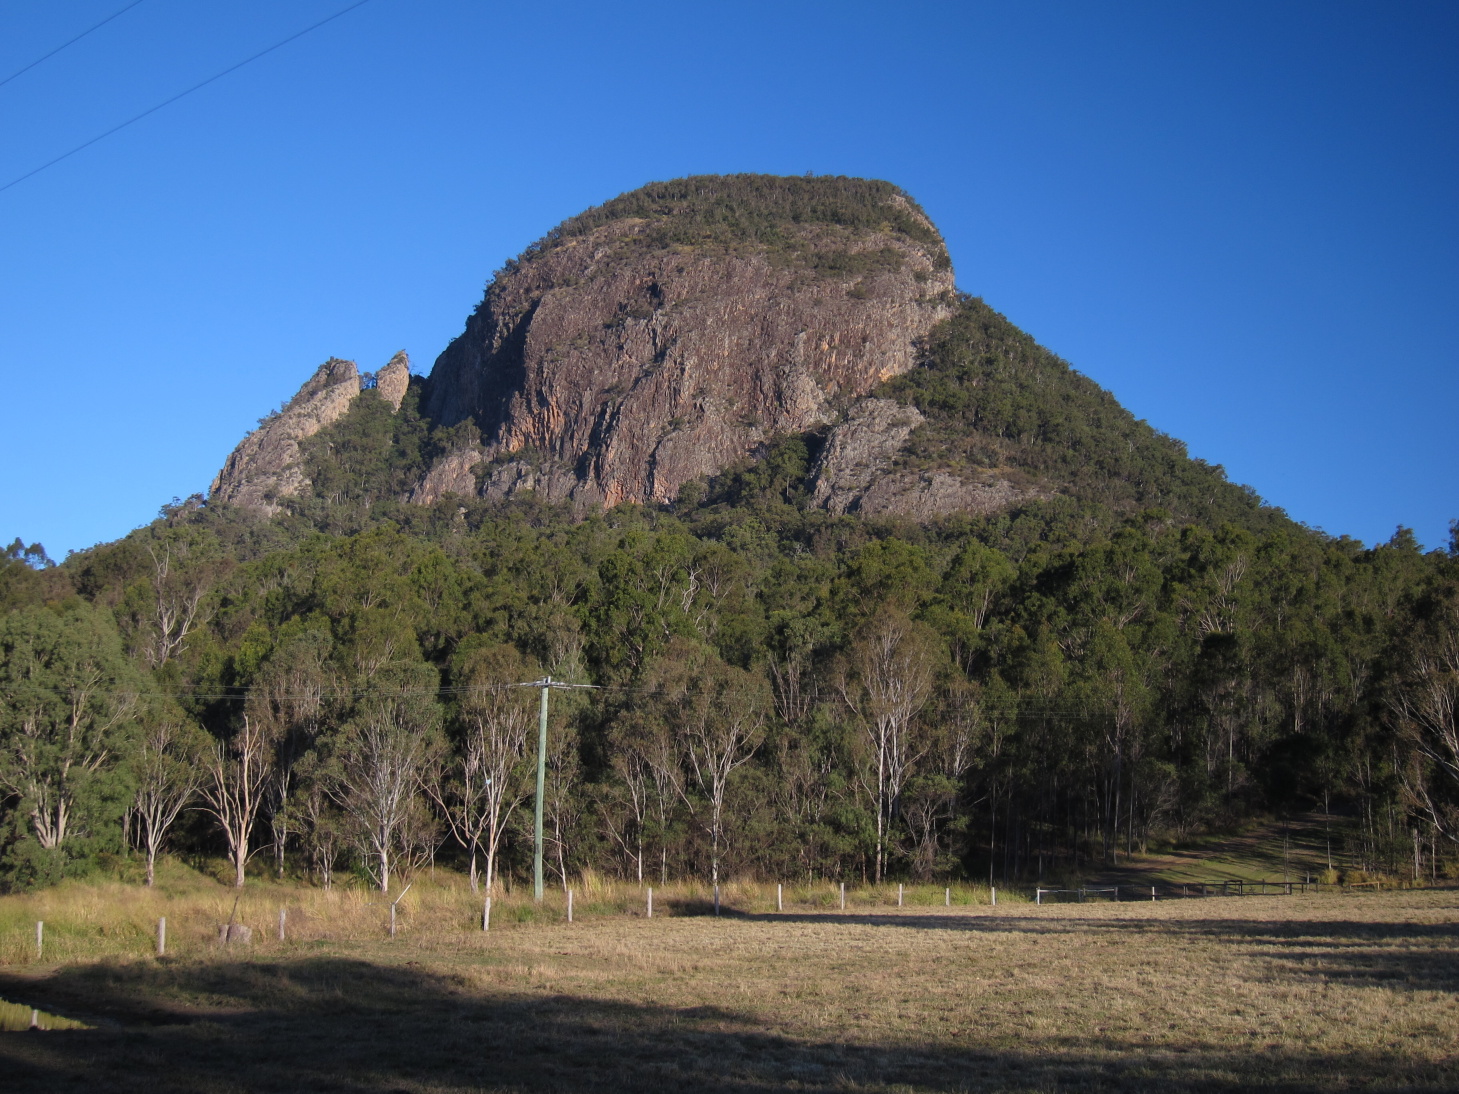 |
| Mt. Greville |
Saturday, 11 June 2011
Main Range, Mt. Lindsay and Wild Oasis
Here's a few pictures from yesterday's adventures.
This was the road to the start of our intended walk yesterday near The Steamers on the Main Range and was the point where we started to get worried about whether we would reach our intended destination in the 2wd Tuscon. Damn that water was cold!!
This is where we did in fact decide that we weren't going to reach the start of the walk and turned around.
These photos were taken on the way to Mt. Barney after driving through Killarney and up the Mt. Lindsay Hwy. We eventually decided to cut our losses and head for home.
The upside was that we got home with enough time to to have a play with the latest piece of gear to arrive. I picked up a Six Moon Designs Wild Oasis tarp shelter second hand off the bushwalking forums. I had been thinking of trying out a Pyramid type shelter and when this popped up it was perfect. Weight is 400g which includes the perimeter bug netting and guylines. Adding a 100g Tyvek ground sheet and 6 pegs for 50g makes a 550g single person, mostly bug proof shelter.
Not having a fixed floor means the pitched height can be changed depending on the conditions. When pictched moderately higher there is plenty of room for sitting up and for sleeping inside. Entry and exit is easy aswell. When pitched to the ground for bad weather the space is limited so I would only do this in very bad weather. Hope to get out for a proper test run soon.


 |
| Creek Crossing #3 |
 |
| Creek Crossing #4 |
 |
| Mt. Lindsay from the Highway |
 |
| Mt. Lindsay from Barney View Rd. |
The upside was that we got home with enough time to to have a play with the latest piece of gear to arrive. I picked up a Six Moon Designs Wild Oasis tarp shelter second hand off the bushwalking forums. I had been thinking of trying out a Pyramid type shelter and when this popped up it was perfect. Weight is 400g which includes the perimeter bug netting and guylines. Adding a 100g Tyvek ground sheet and 6 pegs for 50g makes a 550g single person, mostly bug proof shelter.
Not having a fixed floor means the pitched height can be changed depending on the conditions. When pictched moderately higher there is plenty of room for sitting up and for sleeping inside. Entry and exit is easy aswell. When pitched to the ground for bad weather the space is limited so I would only do this in very bad weather. Hope to get out for a proper test run soon.


Subscribe to:
Comments (Atom)